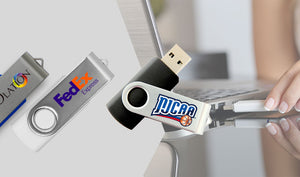
How to Use a USB Flash Pen Drive as RAM
How to Use a USB Flash Pen Drive as RAM
Is your computer running sluggishly, but you’ve realized you have no extra slots for another memory stick?
Can’t break the budget with a RAM upgrade?
If you have extra USB drives around the house or office, you’re in luck!
Read on to learn how to use a USB flash pen drive as RAM to speed up your system!
Understanding Virtual RAM
When a computer uses up all of the available physical RAM, it will resort to using virtual memory to run programs and tasks.
Virtual RAM works by copying unused areas in the RAM to the system’s hard drive, freeing up RAM space in the process.
While the process is efficient and helps the computer run smoothly, the read and write speeds of a hard drive are not as fast as physical memory.
Choosing a USB Flash Pen Drive
Using a USB flash pen drive as virtual RAM, alongside your physical memory is a simple and cheap way to give your computer some extra speed.
For this purpose, consider purchasing a USB stick that has more than 4GB of storage.
If possible, you should choose a USB 3.0 drive, rather than the older USB 2.0 models. USB 3.0 has file transfer speeds up to 640 MB/s which is useful when using a USB drive as RAM.
Setting Up The Drive as RAM
Before setting up your USB drive as RAM, be sure that the drive is totally free of any files.
Here’s a step-by-step process to make your computer recognize the drive as RAM:
- First, rename the pen drive as “RAM USB” or something similar, for your own reference.
- Right click on My Computer and click Properties. From there, click Advanced System Settings.
- In System Properties, click on the Advanced tab and under the Performance Box click on Settings.
- In the new window, click on the Advanced tab again and under the Virtual Memory box click Settings.
- Select your RAM flash drive and select the user-defined size option.
- Look at the size of your flash drive and subtract 10MB.
- Type this new number into both the Initial Size and Maximum Size boxes.
- Apply the settings by clicking Set and OK at the bottom of the window.
- Restart your computer for the settings to take effect.
Using ReadyBoost
Alternatively, another method to use a USB flash pen drive as RAM is by turning on ReadyBoost in Windows Vista and later.
To use ReadyBoost, insert your flash drive and right click on it to open properties. Scroll to the ReadyBoost tab and select Use This Device.
Subtract 200MB from the amount of storage on your drive and type this number in the box. Finally, click Apply and you’re all set!
Speed Up Your System!
If you’re in a jam and need more RAM, using a USB flash pen drive as virtual RAM is a great way to give your system a boost!
Need help setting up your flash drive as RAM or not sure what kind of drive to choose for your storage needs? Contact us and our team will be happy to answer your questions!
CONTACT US
- choosing a selection results in a full page refresh
 Thanksgiving sale! Use code:
  Black Friday Sale! Use code:
  Cyber Monday! Use code:
  Giving Tuesday! For every order we will donate a toy to TOYS FOR TOTS
